Detail Shot Checklist for the Kimono Wedding Album
A 15-25 frame detail shot checklist for kimono wedding albums: obi knots, kanzashi, han-eri, family crests, paired hands. Coordinate the list with your studio 7-10 days pre-shoot and block 30-60 minutes on the day timeline.

Illustrative image · Unsplash. Not a photo of the specific people, places or services discussed.
Check current prices, availability and venue rules with the relevant studio or venue before booking.
A kimono wedding album lives or dies on its 15-25 detail shots — the close-ups of the obi knot, the kanzashi sitting against an updo, the red han-eri at the collar, the family crest on a groom's montsuki. These are the frames a viewer leans into when they pick up the album six months later. Walk into the shoot without a written detail shot checklist and you will miss half of them: the photographer will prioritize wide portraits, the dresser will move the obi out of light, and the 30-60 minute window for details will be eaten by retouches and posed wides.
Why Detail Shots Make the Album
A Western wedding album leans on wide reportage: aisle walk, kiss, exits, candid laughter. A kimono album rewards the opposite priority. The kakeshita, obi, and hair are layered crafts produced by separate artisans — the silk-weaver in Nishijin, the kanzashi-maker in Asakusa, the dresser who tied the obi that morning. A wide portrait flattens all of that into "bride in red". A detail shot at f/2.8, 100mm macro, centred on the fukura-suzume knot, returns the album to what the day was actually about: 1,200 years of textile craft worn for an afternoon.
Industry albums delivered by Tokyo and Kyoto kimono studios typically run 60-80 retouched images. Of those, 15-25 are details. The ratio is not arbitrary — it is what holds the eye when a viewer flips through pages quickly. Each detail shot needs to function alone as a frame, not as a supporting cutaway. That requires the photographer treats the shot list as a deliberate sequence, not as filler between portraits.
Wedding Planner's Notes: When couples skip the detail-shot conversation pre-shoot, the album that arrives 4-6 weeks later feels generic. Couples report this as "the photos look fine, but they could be of anyone in a red kimono". The fix is a written list shared with the studio at the planning call, not at the shoot itself.
The Bride's Detail Shot Checklist
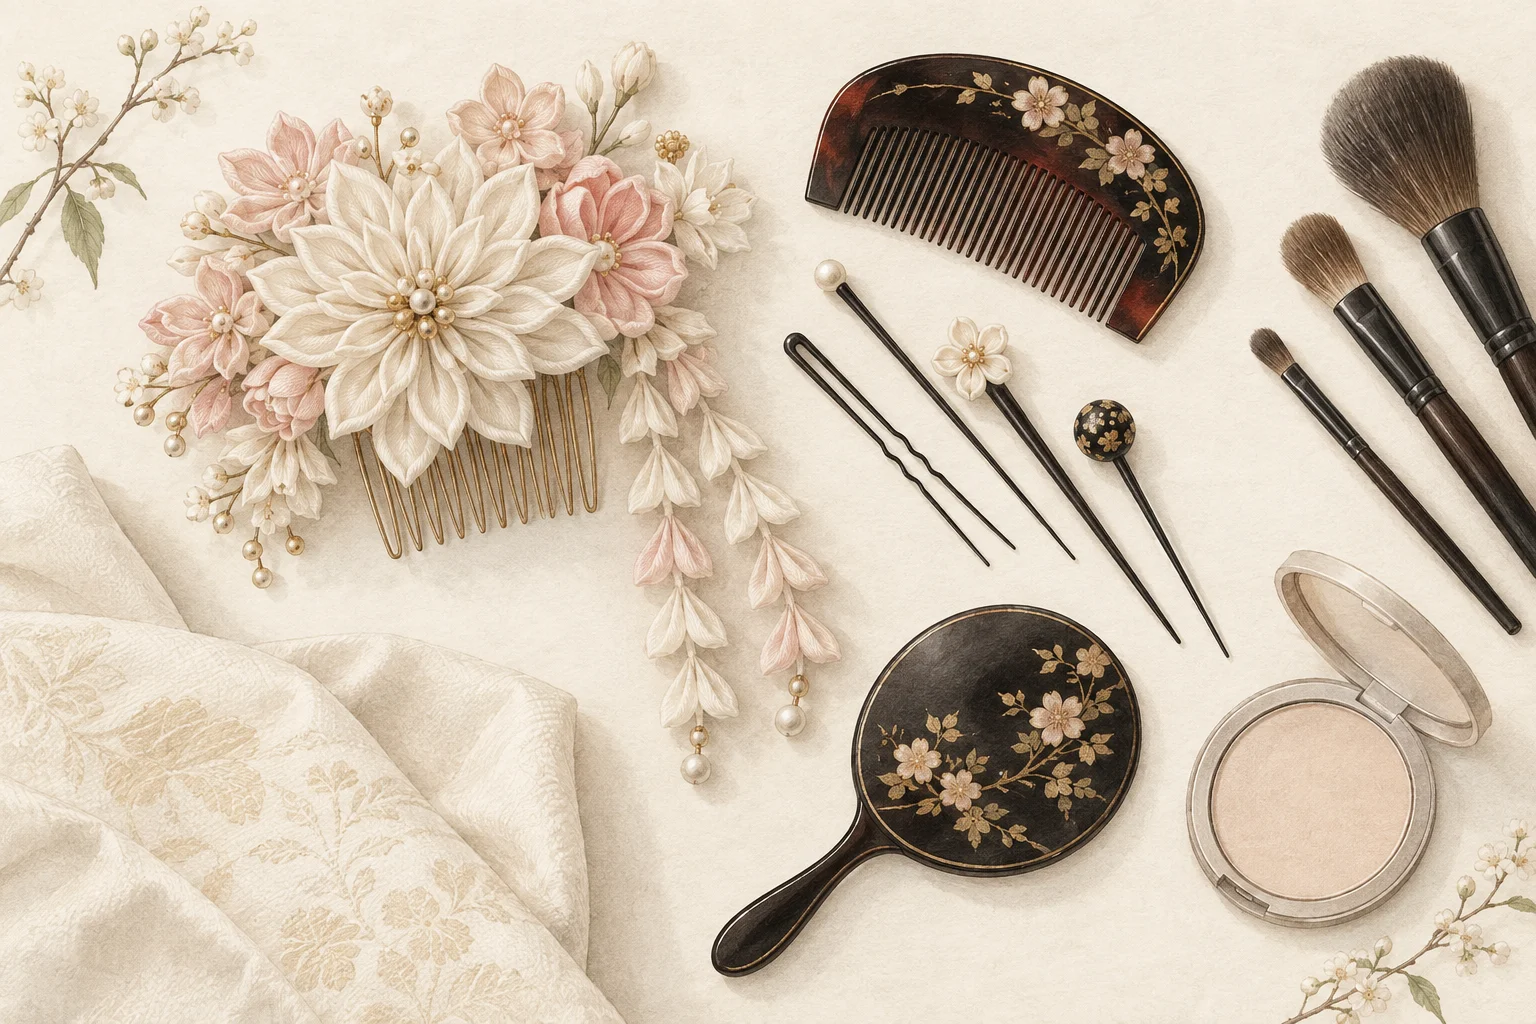
The bride carries 10-12 distinct details that warrant individual frames. Run through the list with your photographer 7 days before the shoot.
Hat (Tsunokakushi or Wataboshi)
The wataboshi (white cocoon hood) or tsunokakushi (white silk band) is the highest-impact single accessory. Shoot from the back-three-quarter angle when the bride is looking down — this captures the headpiece's silhouette against the kakeshita collar. A second frame: front-on, eyes lowered, focus on the fabric texture. Avoid direct overhead light; it flattens the wataboshi's curve. See hair and makeup for shiromuku for headpiece-fitting notes.
Kanzashi Hair Ornament
Bridal kanzashi are typically silver, gold, or lacquered with seasonal motifs (cranes, plum, chrysanthemum). Shoot from behind the bride at temple level with a 50-85mm lens — this isolates the ornament against the smooth shimada updo. Ask the dresser to angle the kanzashi 5 degrees forward before the frame so it catches available light. Cross-reference kanzashi hair ornaments for ornament-pairing context.
Obi Knot (Fukura-Suzume or Bunko)
The fukura-suzume ("plump sparrow") is the standard bridal obi musubi — a three-loop knot with two upward "wings". Photograph it dead-centre from behind, no angle, with the bride standing still and shoulders relaxed. Distance: 1.5-2 metres at 85mm. The knot should fill 60% of the frame. A second pass at 30 degrees of rotation captures the dimensional layering. See obi musubi bridal styles for knot-identification.
Obi-Jime Decorative Cord
The obi-jime is the narrow decorative cord tied across the front of the obi, often white with red flecks or pure white for shiromuku. Frame at waist height, side-lit so the cord's braided texture reads. This is a 5-second shot but easy to skip — flag it on the list explicitly.
Kakeshita Kimono Pattern Close-Up
The kakeshita (under-kimono visible at hem and sleeve) carries embroidered motifs — phoenixes, cranes, pine, bamboo — at 1:1 macro scale. Shoot at hem level with the bride seated, fabric pulled gently flat by the dresser. A 100mm macro lens captures thread direction. One frame on the front hem, one on the sleeve embroidery, one on the shoulder if a phoenix motif is present.
Han-Eri Red Trim at Collar
The han-eri is the decorative collar of the naga-juban visible above the kimono neckline — typically 1-2cm of red silk for bridal wear. Shoot from front-three-quarter with the bride's chin slightly lifted, focus on the collar line itself. The neck and jaw fall out of focus naturally at f/2.8. This is a frequently-requested detail shot because it pulls the eye to the colour contrast.
Sleeve Cuff (Furi)
The kakeshita's long sleeves carry embroidery at the cuff edge and a red lining visible when the sleeve hangs. Photograph the bride's hand at her side, sleeve hanging naturally, frame at hip level. The pattern detail and lining red read together in one frame.
Naga-Juban Red at Wrist
Where the kimono sleeve ends, the naga-juban's red lining shows for 1-2cm. Pose the bride with hands clasped at the waist, framed at chest level. This works as a paired shot with the groom's hand on hers — see paired shots below.
Zori/Setta Footwear
Bridal zori are typically white silk or brocaded fabric with a 4-5cm platform. Shoot at ground level with the bride standing — feet together, kakeshita hem just clearing the zori. A 35-50mm lens works; macro is unnecessary at this scale. Many couples want this as a flat-lay alternative (zori and bridal fan arranged on tatami).
Tabi Socks
White tabi (split-toe socks) appear in the zori frame but warrant their own close-up — particularly the split between big toe and second toe, which signals "Japanese formalwear" instantly to a viewer. Frame at ankle height. Skip this if the kakeshita hem fully covers tabi in standing pose.
Bridal Fan
The sensu (folding fan) is held closed in the bride's right hand throughout most of the shoot. Frame her hand at chest level, fan vertical, gold or red lacquered handle visible. Open-fan frames are typically reserved for portrait wides — the closed-fan detail reads as "bride is ready, about to enter ceremony".
The Groom's Detail Shot Checklist
The groom's montsuki-haori-hakama carries 5-6 details worth dedicated frames. Most albums under-shoot the groom's details — typically 3-4 frames vs. the bride's 10-12 — and the imbalance is felt when paging through. Insist on the full set. See groom's hakama formal wear for context.
Mon (Family Crest on Montsuki)
The montsuki (black formal kimono) carries five family crests: one on the back centre, two on the sleeve backs, two on the chest front. The back-centre mon is the hero shot — frame from directly behind the groom at shoulder height, mon centred at 60% of frame, focus on the embroidered or printed crest detail. Side-light reveals texture if the mon is embroidered (older formal montsuki) vs. printed (modern rental).
Hakama Stripes
The hakama (pleated wide-leg trouser) carries vertical pin-stripes in grey, navy, or black-on-grey. Shoot at hip-to-knee level, groom standing facing camera, frame on the leg-pleat structure. The pleats fall in a precise geometric pattern — a 35-50mm lens isolates 2-3 pleats at fill-frame scale.
Kaku-Obi Tie
The kaku-obi is the narrow stiff obi tied at the groom's waist beneath the haori. Shoot from the back at waist level, focus on the knot itself. Most rental kaku-obi knots are pre-tied; ensure the photographer captures the knot before the haori is buttoned over it.
Haori Cord (Hane-Himo)
The haori cord (haori-himo or hane-himo) is the white silk tassel tying the haori's front. Frame at chest level, focus on the tassel detail. This is a 30-second shot — easy to forget without the list.
Zori Footwear
Groom's zori are typically black lacquered with white tabi. Same ground-level frame as the bride's, hakama hem clearing the zori. Often shot as a paired image with the bride's zori side-by-side on tatami.
Paired Detail Shots
3-4 paired detail shots photograph both partners in a single frame and carry disproportionate weight in the final album. These are the frames couples share to family chat groups.
Hands Holding Sake Cup
The san-san-kudo sake cup held between both partners' hands is a signature detail of the ceremony. Frame at chest level, both hands and cup centred, fabric of both kimono visible at the edges. See san-san-kudo sake ritual for cup-handling context.
Ring-on-Finger Detail
Rings are typically worn on the right ring finger after Shinto ceremony in Japan. Frame the bride's left hand resting on the groom's right hand, rings visible, kakeshita and montsuki sleeve as background. A second frame captures the rings against the white wataboshi or red han-eri.
Shadows on Tatami
An overlooked detail: the shadow of two seated figures on a tatami mat, lit by shoji-paper window light. Frame from above at 45 degrees. This works in shrine ante-rooms, ryokan washitsu, and most Japanese-style studios. Not every photographer thinks to shoot it — request it explicitly.
Composition and Lighting for Each Detail
The default detail-shot recipe: 85-100mm lens, f/2.8-4, ISO 400-800, available window light or single off-camera strobe at 45 degrees. Tripod-mounted for macro frames. The kimono fabric (silk, brocaded gold thread) reads best with directional soft light — overhead studio strobes flatten the texture, hard sun bleaches the red, and on-camera flash kills the dimensional weave.
For interior shrine and ryokan shoots, position the subject 1.5-2 metres from a north-facing window. For studio shoots, ask the photographer to confirm a soft-box at 45 degrees rather than overhead. For outdoor shoots, schedule details for the 60 minutes after sunrise or before sunset (golden hour) — midday sun is unforgiving on red silk. See golden hour kimono photography for timing.
White-balance matters more for detail shots than wides. The kimono's red can shift to orange under tungsten or to magenta under fluorescent. Confirm the photographer shoots RAW (every studio in the Wasou directory does) and discuss colour-grading direction during the planning call. See colour grading styles for delivery expectations.
Time Budget (30-60 Minutes for Full Set)
A complete 15-25 frame detail set takes 30-60 minutes of dedicated shooting time, separate from portraits. Allocate it as a discrete block in the day timeline — not as "we'll get details between portraits". The block typically falls after the first portrait set (when the dresser has approved the kimono fit) and before the san-san-kudo ritual frames.
Block | Time | Shots |
|---|---|---|
Bride solo details | 20-25 min | 10-12 frames |
Groom solo details | 10-15 min | 5-6 frames |
Paired details | 10-15 min | 3-4 frames |
Buffer / reshoots | 5-10 min | — |
Total | 45-65 min | 18-22 frames |
If the package is a compressed 90-minute shoot, the detail block compresses to 25-30 minutes and the count drops to 12-15 frames. Discuss this trade-off explicitly with the studio. See shoot duration and photoshoot day timeline.
Studio vs Outdoor Detail Shot Lighting
Studio details are easier to control: consistent soft light, no wind on fabric, dresser available for adjustments, tatami background neutral. The trade-off is sterility — every studio detail looks similar across providers. Outdoor details carry the location (cherry petals on the zori, autumn leaves behind the obi knot, shrine torii framing the wataboshi silhouette) but introduce wind, harsh contrast, and limited dresser access.
A common hybrid: shoot 70% of details indoors (controlled light, full dresser support) and 30% outdoors as environmental frames (paired with the location). See studio vs outdoor for trade-offs. Couples optimising for an editorial album lean indoor-heavy; couples optimising for "this is Japan" feel lean outdoor-heavy.
Coordinating with Photographer Pre-Shoot
Send the written detail list to the studio 7-10 days before the shoot. Format: numbered list with shot description (e.g., "1. Fukura-suzume from behind, full frame, 85mm"). Ask the studio's response on (a) whether their standard package covers all listed shots, (b) the time block allocated for details, and (c) whether they have reference album pages showing similar detail work.
Most established kimono studios will return their own internal detail checklist — comparing the two surfaces gaps. If a studio doesn't have a checklist, treat that as a signal: they may shoot details ad-hoc rather than systematically, and your delivered album will reflect that. See reading a photographer's portfolio for portfolio-evaluation framing.
One coordination note: detail shots are typically delivered as part of the standard retouched set, not as a separate add-on. If a studio quotes details as a paid extra, push back — it should be inclusive of the package. See raw photo delivery policy for delivery expectations.
Frequently Asked Questions
How many detail shots should a kimono album include?
15-25 retouched detail frames is the industry standard for a 60-80 image album. Below 12 feels under-shot; above 30 starts to feel repetitive. Confirm the count target with your studio at the planning call.
Can I request additional detail shots after the shoot if I notice gaps?
No — detail shots cannot be reshot after the dresser has unbuttoned the obi and the kanzashi has been removed. This is why the pre-shoot checklist is non-negotiable. Once the kimono comes off, the day is over.
Do I need to ask if the photographer has a macro lens?
For kimono detail work, an 85-100mm prime at f/2.8 is sufficient — a true 1:1 macro is not required. Established kimono studios all carry suitable glass. If a photographer is shooting only with a 24-70mm zoom, ask how they plan to handle obi-knot and embroidery close-ups.
Are flat-lay detail shots (kanzashi, fan, zori on tatami) common?
Yes — flat-lays are a delivered detail subset in 30-40% of premium packages. They photograph the accessories arranged on tatami before the bride wears them, often as the album's opening or closing spread. Request explicitly if you want them — they add 15-20 minutes to the shoot.
Should the detail list be shared with the dresser, not just the photographer?
Yes. The dresser controls fabric movement, obi tension, and accessory placement. A list of "we want a clean fukura-suzume frame at 90 degrees" tells the dresser to ensure the knot is symmetric before the photographer fires. Most studios coordinate dresser and photographer through one producer — confirm that producer has the list.
Does prewedding video coverage reduce detail-shot quality on the photo side?
Only if the studio uses a single operator for both. Reputable packages assign a dedicated photographer plus a separate videographer. If one person is handling both, expect detail count to drop by 20-30% — confirm staffing model before booking. See prewedding video vs photo for pairing notes.
Do detail shots interfere with couple posing?
No — details are a separate shot block run before or after the posed couple work. Some details (sake cup hands, ring-on-finger) overlap with paired poses. See couple pose guide for sequence integration.
Discuss Detail Shots with Your Studio
A detail shot checklist is a high-leverage piece of preparation a couple can bring to a kimono shoot. Bring it to the planning call, get the studio's response in writing, and confirm the 30-60 minute time block on the day timeline. Browse our directory of kimono wedding photographers and ask each studio shortlist candidate for sample detail spreads from delivered albums.
Once you have the detail block confirmed, the next two planning conversations are video coverage and couple posing. Read prewedding video vs photo to decide whether to add a videographer, then couple pose guide for kimono photography to align on the posed-portrait set that sits alongside your detail frames.
Related guides
 General guide
Reading a Japanese Photographer Portfolio: Signals & Red Flags
Illustrative image · Unsplash. Not a photo of the specific people, places or services discussed.
Learn the five quality signals and red flags when reading a Japanese photographer portfolio — vetting kimono studios before you book from abroad.
Read the guide General guide
Cinematic vs Editorial vs Documentary Kimono Photography
Illustrative image · Unsplash. Not a photo of the specific people, places or services discussed.
Compare cinematic, editorial, and documentary kimono photography styles. Planner guide to matching aesthetic, pacing, and album feel to your Japan shoot.
Read the guideGeneral guideFilm vs Digital Kimono Photography Japan: Trade-offs
Illustrative image · Unsplash. Not a photo of the specific people, places or services discussed.
Film vs digital kimono photography in Japan — aesthetic appeal, Portra stocks, lab realities, costs, and which makes sense for foreign couples.
Read the guide