Kaku-Obi for the Groom: Narrow Men's Bridal Obi Japan
Kaku obi mens bridal Japan guide: 9-10cm width, 4m length, kai-no-kuchi vs katabasami knots, silk vs polyester, ¥5K-¥30K rental, knot positioning for photos.

Illustrative image · Unsplash. Not a photo of the specific people, places or services discussed.
Check current prices, availability and venue rules with the relevant studio or venue before booking.
The kaku-obi (角帯) — the narrow men's obi worn with formal wedding montsuki — looks subtle next to the bride's 30-cm bridal obi but anchors the groom's silhouette and varies meaningfully across the few tying styles used at Japanese weddings. At 9-10 cm wide and 4 m long, it determines how the hakama sits at the waist, where the knot rides on the back, and whether the groom photographs as tightly composed or visibly loose. Most couples never discuss it during fittings. They should — because once the kimono is on, the obi is the first thing a photographer's eye reads.
What the Kaku-Obi Is
The kaku-obi is the standard formal men's obi worn with montsuki haori hakama — the full formal kimono ensemble used by grooms at Shinto weddings, formal photo sessions, and traditional ceremonies. The name kaku (角) means "stiff" or "rigid," referring to the firm woven construction that distinguishes it from softer, casual men's obi like the heko-obi (兵児帯) used with summer yukata.
It sits under the hakama at the waist, wrapped twice around the body and tied in a small, flat knot at the back or front. Most of the obi is hidden by the hakama once dressing is complete — only the knot itself and a thin band visible above the hakama waistline read in photographs. This is why the obi's color, pattern, and knot precision matter disproportionately: a small detail does most of the visual work.
Wedding Planner's Notes: Grooms frequently underestimate the kaku-obi because so little of it shows. But the knot is visible in every back-facing photo, every walking shot through a shrine corridor, and every full-length composition. A sloppy or asymmetric knot ruins frames the bride spent six months preparing for.
Dimensions: 9-10 cm Width, 4 m Length
Standard kaku-obi measurements are consistent across formal grades:
- Width: 9-10 cm (3.5-4 inches). Some premium pieces reach 11 cm. Compare to the bride's bridal obi at ~30 cm — roughly one-third the width.
- Length: 4 m (~13 ft). Enough to wrap twice around the waist with material left for the knot.
- Weight: 200-400 g depending on material and weave density.
- Thickness: Stiff but pliable; holds knot shape without internal padding.
These dimensions are standardized because they pair with hakama measurements. A wider obi would push the hakama waistline upward and shorten the visible hakama silhouette in photographs. A narrower obi would fail to support the hakama and let it slip during movement.
How It Differs from the Bridal Obi
The contrast with the bride's obi is dramatic and intentional. The bridal obi (see our guide to bridal obi musubi styles) is 30 cm wide, 4-4.5 m long, and tied into elaborate knots — bunko, taiko, fukura suzume — that rise 15-30 cm above the bride's back. These knots are designed to be photographed as standalone features and often define the visual identity of the bridal look.
The kaku-obi, by contrast, is deliberately restrained. Its knot sits flat and small — typically 8-12 cm across — and disappears partially under the haori jacket. This asymmetry in obi prominence reflects a traditional aesthetic principle: the bride is the visual focus, and the groom's role is to frame her without competing.
Kaku-Obi (Groom) | Bridal Obi (Bride) | |
|---|---|---|
Width | 9-10 cm | ~30 cm |
Length | 4 m | 4-4.5 m |
Knot size | 8-12 cm | 20-40 cm |
Visibility | Partially hidden by hakama and haori | Featured prominently |
Tying time | 3-5 minutes | 20-40 minutes |
The Two Standard Tying Styles
Unlike the bride's wide range of obi musubi options, the groom has effectively two formal choices for wedding context. Both are flat, restrained, and intended to support rather than display.
Kai-no-Kuchi (Most Formal, "Shell Mouth" Knot)
The kai-no-kuchi (貝の口) is the most formal and traditional knot for weddings. The name translates as "shell mouth" — the finished knot resembles the slightly open lip of a clam shell. The technique involves folding both ends of the obi back on themselves at right angles, creating two flat, overlapping rectangular shapes that interlock.
Visual characteristics:
- Compact rectangular shape, 8-10 cm across
- Two distinct flat planes overlapping at a slight angle
- Sits flush against the body with minimal projection
- Reads cleanly in profile and back-view photography
Kai-no-kuchi is the default for grooms at Shinto shrine weddings and formal photo sessions. Wedding dressers (kitsuke specialists) at established studios will tie kai-no-kuchi unless the groom specifies otherwise.
Katabasami (Modern Simplified)
Katabasami (片挟み — "one-side tuck") is a simplified variant where only one end of the obi is tucked, with the other end allowed to hang short. The result is a slightly asymmetric, more relaxed knot that takes less time to tie and reads as marginally less formal.
This style emerged as a practical option for modern grooms — particularly for casual photo sessions, reception-only formal wear, or grooms with limited dressing time. It's appropriate for non-shrine venues (private estates, photo studios, restaurant ceremonies) but considered slightly informal for traditional Shinto rituals.
Wedding Planner's Notes: If the wedding involves any traditional Shinto element (shrine ceremony, san-san-kudo sake ritual, formal photo at a venue with religious context), choose kai-no-kuchi. Katabasami is acceptable but reads as informal to Japanese guests and shrine staff. The 3-minute time difference is worth it.
Knot Position: Front-Center vs Side
Where the knot sits is a separate decision from which knot is tied. Three positions are used:
- Back-center (most common): The default for formal kai-no-kuchi. Knot is centered on the lower back, hidden partially by the haori jacket. Reads cleanly in three-quarter and profile shots.
- Front-center (traditional alternative): Used for very formal traditional contexts and for grooms in regional traditional dress. The knot becomes a visible front detail, framed by the hakama waistline. More visually prominent in straight-on portraits.
- Slightly off-center (informal): Knot positioned at the right or left hip rather than centered. Used occasionally for relaxed contemporary styling but not recommended for formal wedding context.
For 95% of Shinto weddings and formal kimono shoots, back-center kai-no-kuchi is the correct combination. Confirm with the studio's dresser at the fitting if you have a preference — they'll default to back-center unless asked.
Material Options
Silk (Formal)
Silk kaku-obi is the standard for formal weddings. Construction is typically densely woven plain weave (heiori) or twill weave (tsumugi) in jet black, deep navy, or oyster grey. Higher-grade pieces feature woven-in patterns: subtle geometric motifs, family-crest-style emblems, or restrained floral patterns in a single contrasting thread.
Silk holds its knot shape sharply, drapes without sagging, and photographs with a slight sheen that registers as quality even at small visible scale. The most formal grade — kuro silk with woven dark-on-dark patterns — pairs with the formal black montsuki haori hakama set.
Cost: ¥5,000-¥30,000 rental (typically included in groom's kimono package), ¥20,000-¥150,000 purchase for individual pieces.
Polyester (Casual)
Polyester kaku-obi exist for casual contexts — summer yukata, contemporary fashion kimono, photo shoots that don't require formal grading. They're not appropriate for Shinto wedding ceremonies but acceptable for engagement photo sessions, themed shoots, or casual reception attire.
The visual difference is detectable to anyone familiar with kimono — polyester has a flatter sheen, slightly more rigid drape, and less depth in the woven pattern. In photographs at typical distances, the difference reads as "okay but not premium."
Cost: ¥2,000-¥8,000 rental, ¥5,000-¥30,000 purchase. For a wedding day or formal pre-wedding shoot, the silk upgrade is worth the difference.
Coordinating with Montsuki and Hakama
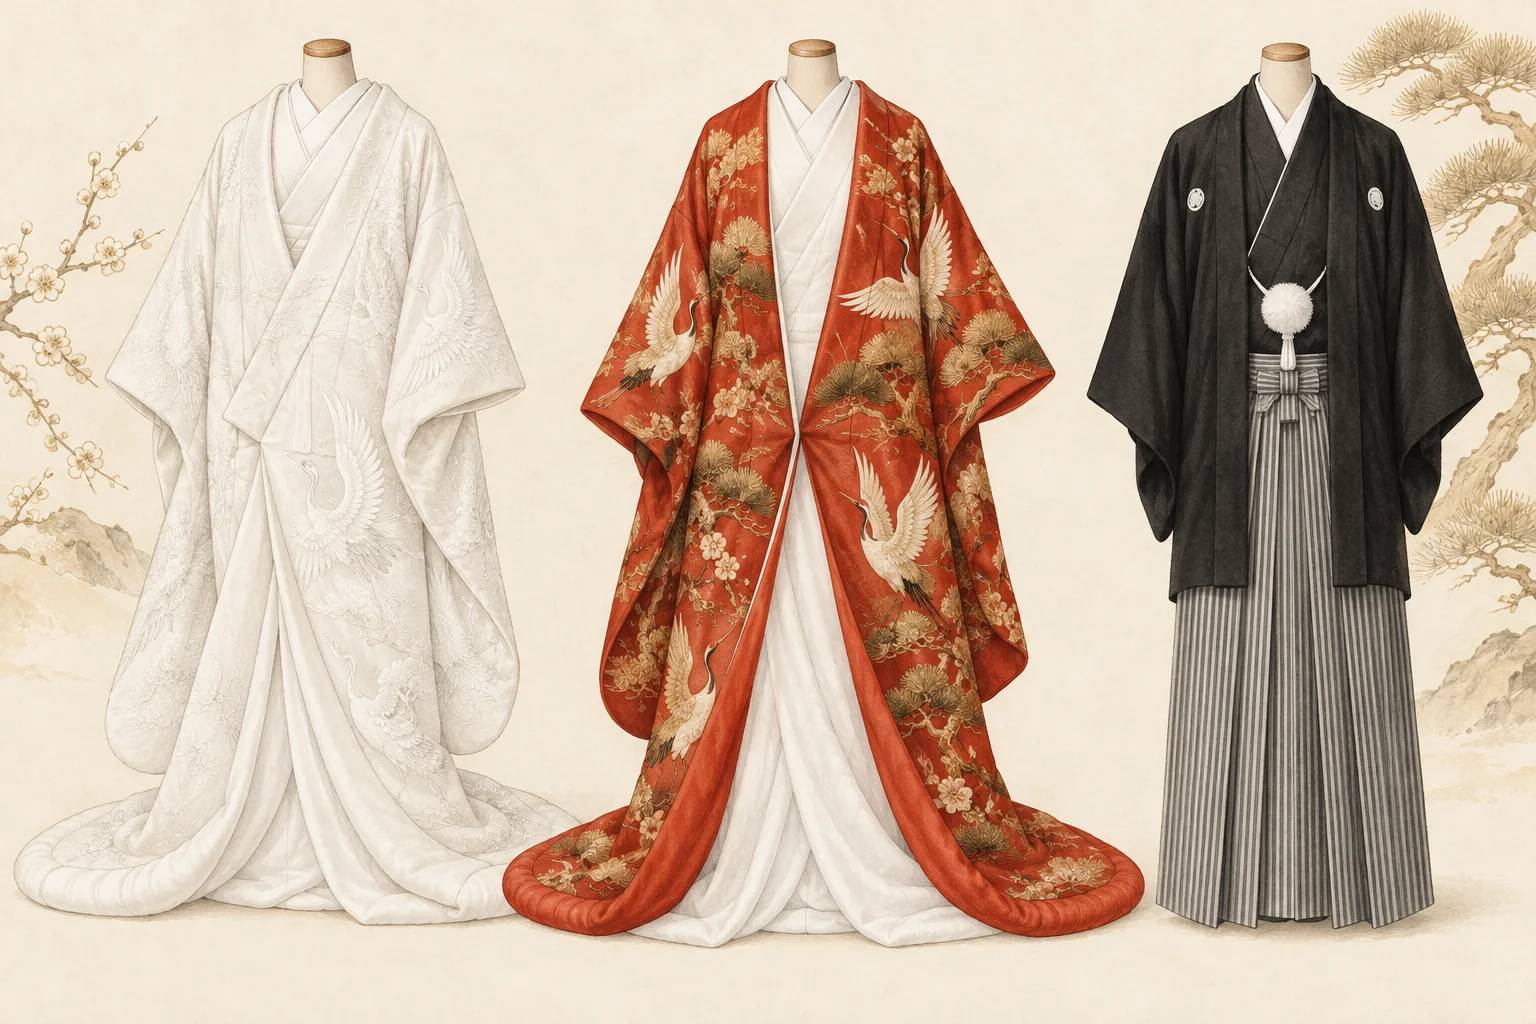
The kaku-obi doesn't exist in isolation — it's the connecting piece between the montsuki kimono and the hakama. Coordination requires considering all three together. See our full guide to the groom's hakama for the matching trousers and our broader notes on the formal montsuki ensemble.
Standard formal combinations:
Montsuki | Hakama | Kaku-Obi |
|---|---|---|
Black with white crests | Striped (sendai-hira) | Black silk with subtle pattern |
Deep navy | Navy or striped | Navy or black silk |
Oyster grey | Grey or striped | Grey or black silk |
Iro-montsuki (color) | Black or striped | Black silk with restrained pattern |
The general rule: the obi should not visually compete with either the montsuki or the hakama. It exists as a small accent. For grooms wearing the standard black montsuki haori hakama (kuro-montsuki), a black silk kaku-obi with subtle woven pattern is the correct default.
Cost: ¥5K-¥30K Rental, ¥20K-¥150K Purchase
Rental kaku-obi are nearly always included in the groom's formal kimono rental package — you won't see them itemized separately. Standalone rental prices, when offered, run ¥5,000-¥30,000 depending on material and pattern quality.
Purchase prices vary widely:
- ¥20,000-¥40,000: Entry-level silk, plain weave, basic patterns
- ¥40,000-¥80,000: Mid-grade silk, higher thread count, more detailed woven patterns
- ¥80,000-¥150,000: Premium silk, named workshops, complex weaves like fukuro-ori
- ¥150,000+: Master craftsman pieces, antique, or special-order with custom family crest motifs
For most international couples, the rental package is the right choice — silk kaku-obi included, no transportation concerns, no storage. Purchase only makes sense if the groom plans to wear formal kimono multiple times (cultural events, future family weddings, traditional New Year visits).
Patterns and Color Coordination
Traditional kaku-obi patterns fall into a few recognizable categories:
- Mujimono (plain): Solid color with no pattern. The most formal option, suitable for the most conservative shrine weddings.
- Komon (small repeating motifs): Subtle geometric or natural patterns repeated at small scale. Acceptable for formal weddings while adding visual texture.
- Tate-jima (vertical stripes): Narrow vertical stripes in subtle contrast. Modern formal.
- Kasuri (ikat-style): Pre-dyed warp and weft creating soft-edged geometric patterns. More casual; better for relaxed contemporary styling.
- Hakata-ori (Hakata weave): Specific regional weave from Fukuoka with characteristic flat narrow stripes. Considered semi-formal and elegant; popular for grooms.
For wedding context, stay in the first three categories. Hakata-ori is acceptable and increasingly popular for contemporary formal grooms.
Photographing the Kaku-Obi Detail
Most groom-portrait shot lists treat the kaku-obi as background — visible but not featured. For couples who want the obi documented properly, request three specific shots from the photographer:
- Back-view full-length: Groom turned away, knot visible at center back. Shows the knot shape and how it interacts with the haori drape.
- Profile waist-detail: Side composition focused on the waistline — obi, hakama waist tie, haori hem alignment. This is where coordination quality reads clearly.
- Pre-tied flat-lay: If the groom is dressing on-site, the obi photographed flat before being tied. Shows the pattern detail that becomes invisible once worn.
Pair these with bridal obi detail shots for a coordinated couple-detail spread in the final album. See our kimono album detail-shot checklist for the full sequence and our tsumami-zaiku hair ornament guide and chirimen crepe silk guide for matching bridal detail coverage.
Frequently Asked Questions
Can the groom tie his own kaku-obi, or does a dresser have to do it?
The groom can technically tie his own kai-no-kuchi knot with practice — it's far simpler than the bride's obi musubi. In practice, the kimono studio's dresser ties it as part of the formal dressing service, which takes 15-25 minutes total for the full montsuki haori hakama ensemble. Self-tying is appropriate for casual yukata but not recommended for formal wedding context.
Does the kaku-obi need to match the bride's obi color?
No — and traditionally they don't. The bride's obi is gold, white, or richly patterned to feature her bridal look; the groom's kaku-obi is dark and restrained to support without competing. Matching colors would compete visually. Coordination is at the ensemble level (formal black montsuki with formal bridal kimono), not the obi color level.
What happens if the obi loosens during the ceremony?
A properly tied kai-no-kuchi should hold for 4-6 hours of normal wear. If it loosens, the dresser or assistant can re-tighten in 1-2 minutes. For a full-day wedding with ceremony, photos, and reception, the studio will re-check and re-tie between phases. International couples staying with the same dressing team throughout the day will have this handled automatically.
Can a foreign groom wear a non-traditional pattern or color kaku-obi?
For a Shinto shrine ceremony, stay traditional — black or navy silk with restrained patterns. For private photo shoots or casual venues, more experimental options are fine: colored silk, Hakata-ori in warm tones, vintage pieces with historical patterns. Discuss with the studio at the fitting; they'll suggest options appropriate to the chosen venue and ceremony type.
How does the kaku-obi differ from the heko-obi?
The kaku-obi is stiff, narrow (9-10 cm), and formal — used with montsuki and hakama. The heko-obi is soft, wider when tied (up to 30 cm visible in the bow), and casual — used with summer yukata or relaxed kimono. They're not interchangeable: a heko-obi at a formal wedding would read as someone wearing pajamas to a black-tie event.
Is the kaku-obi visible enough in photos to matter for budget allocation?
Yes for the knot, less for the body of the obi. The knot is visible in every back-view, three-quarter, and walking shot. The body of the obi is mostly hidden by the hakama. If budgeting between obi upgrade and other kimono elements, prioritize obi quality only if the groom will appear extensively in back-view or formal portrait shots. For couples-focused albums, the bride's obi delivers more visual return.
Can the kaku-obi be tied in a decorative knot like the bride's?
No — and it shouldn't be. Decorative bow-style knots on the kaku-obi read as feminine or as costume rather than formal traditional wear. The flat, restrained kai-no-kuchi or katabasami are the only correct choices for a wedding context.
Find a Studio with Quality Kaku-Obi Coordination
The kaku-obi is small but precise — the kind of detail where the difference between a competent studio and an excellent one shows. Look for studios whose groom packages specify silk material, list kai-no-kuchi as the default tying style, and demonstrate clear coordination between montsuki, hakama, and obi in their portfolio work. Browse our directory of vetted kimono wedding photographers and studios — filter by full-formal montsuki haori hakama experience to find teams who handle groom styling with the same attention as bridal.
For matching bridal detail coverage, read our tsumami-zaiku bridal hair ornament guide next, then our chirimen crepe silk fabric guide for the textile foundation underneath both partners' ensembles.
Related guides
 Style guide
Family Crests (Kamon) on Wedding Kimono
Illustrative image · Unsplash. Not a photo of the specific people, places or services discussed.
Kamon (家紋) are family signatures stitched into formal kimono — five, three, or one crest in fixed positions. Here is how the system works, what rental studios actually provide, and what couples with Japanese heritage should research before the ceremony.
Read the guide Style guide
Montsuki Kimono: The Japanese Groom's Formal Wedding Attire
Illustrative image · Unsplash. Not a photo of the specific people, places or services discussed.
Montsuki kimono explained for grooms: what the crests signal, kuro- versus iro-montsuki, the full outfit, what studios charge, and what to check before booking.
Read the guide Style guide
Hakama Groom Japanese Wedding: Formal Styles & Fit Guide
Illustrative image · Unsplash. Not a photo of the specific people, places or services discussed.
A planner's guide to the hakama groom Japanese wedding look — montsuki, sendaihira stripes, haori, rental costs, and fitting tips for foreign grooms.
Read the guide